Do you want to host a website at home, or run your own personal cloud with Nextcloud? Chances are, you have a dynamic IP address assigned from your ISP. A common issue with running services at home is having to frequently update your DNS records whenever your IP address changes, luckily with Dynamic DNS (DDNS) this can be automated. Cloudflare offers a powerful API that allows us to automate various tasks such as updating what IP address our DNS records point to, a github user has written a shell script that lets us take advantage of Cloudflare’s API without having to write any code!
Prerequisites
- You must own a domain name.
- You must either have your DNS Nameservers pointed to Cloudflare or use Cloudflare as a domain registrar.
- You must have a Linux Server that’s running at home.
- Linux Fundamentals
- Networking Fundamentals.
Table of Contents
Downloading the script
To download the script, first make sure you have git installed and then git clone the script.
Ubuntu / Debian
sudo apt install gitRHEL / Cent OS
sudo yum install gitCloning the repository
git clone https://github.com/K0p1-Git/cloudflare-ddns-updaterThat’s it for now, we have to create an API token to use this script.
Getting our API token and Zone ID
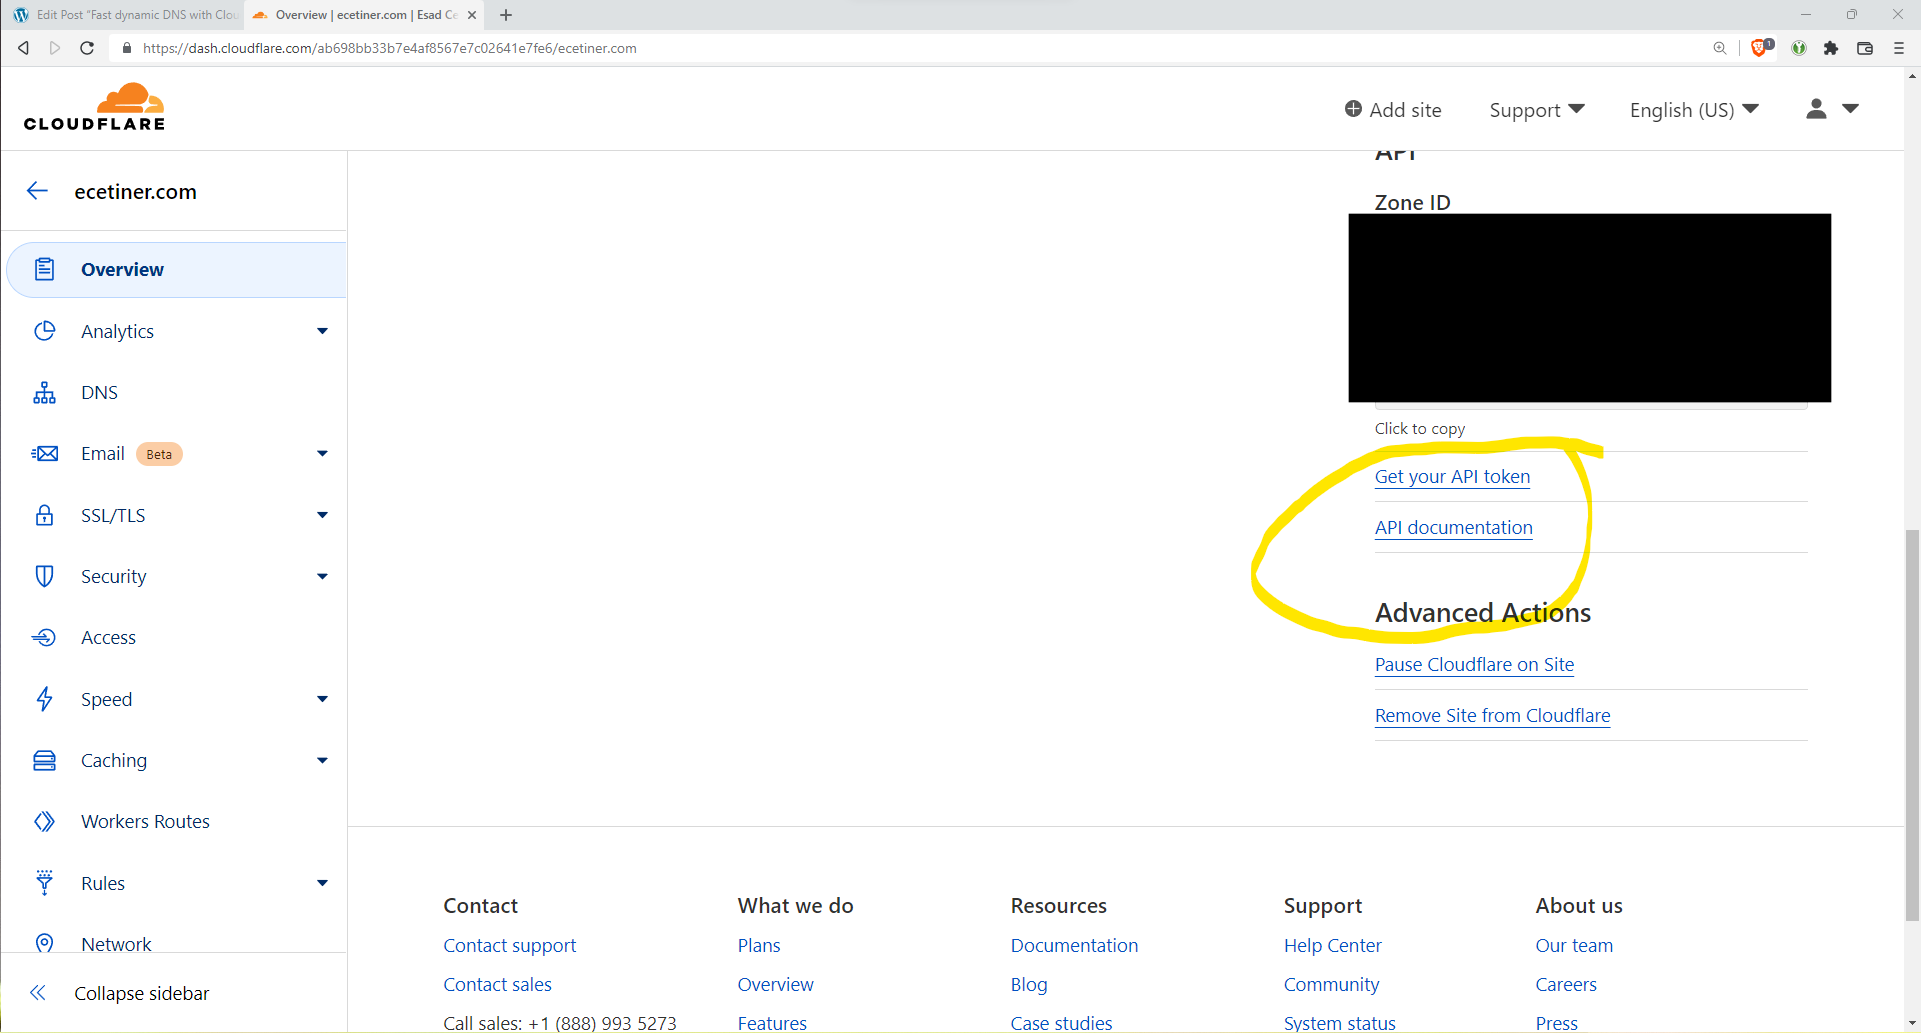
To get your API token go to https://dash.cloudflare.com, log in, and then click your domain name, in my case this is ecetiner.com. You’ll then want to look for “Get your API Token” at the very bottom right of your screen, I’ve included a screenshot as it can be hard to find for some people. Right above “Get your API Token” You’ll see your Zone ID, copy and save it as we’ll need it for the script to work.
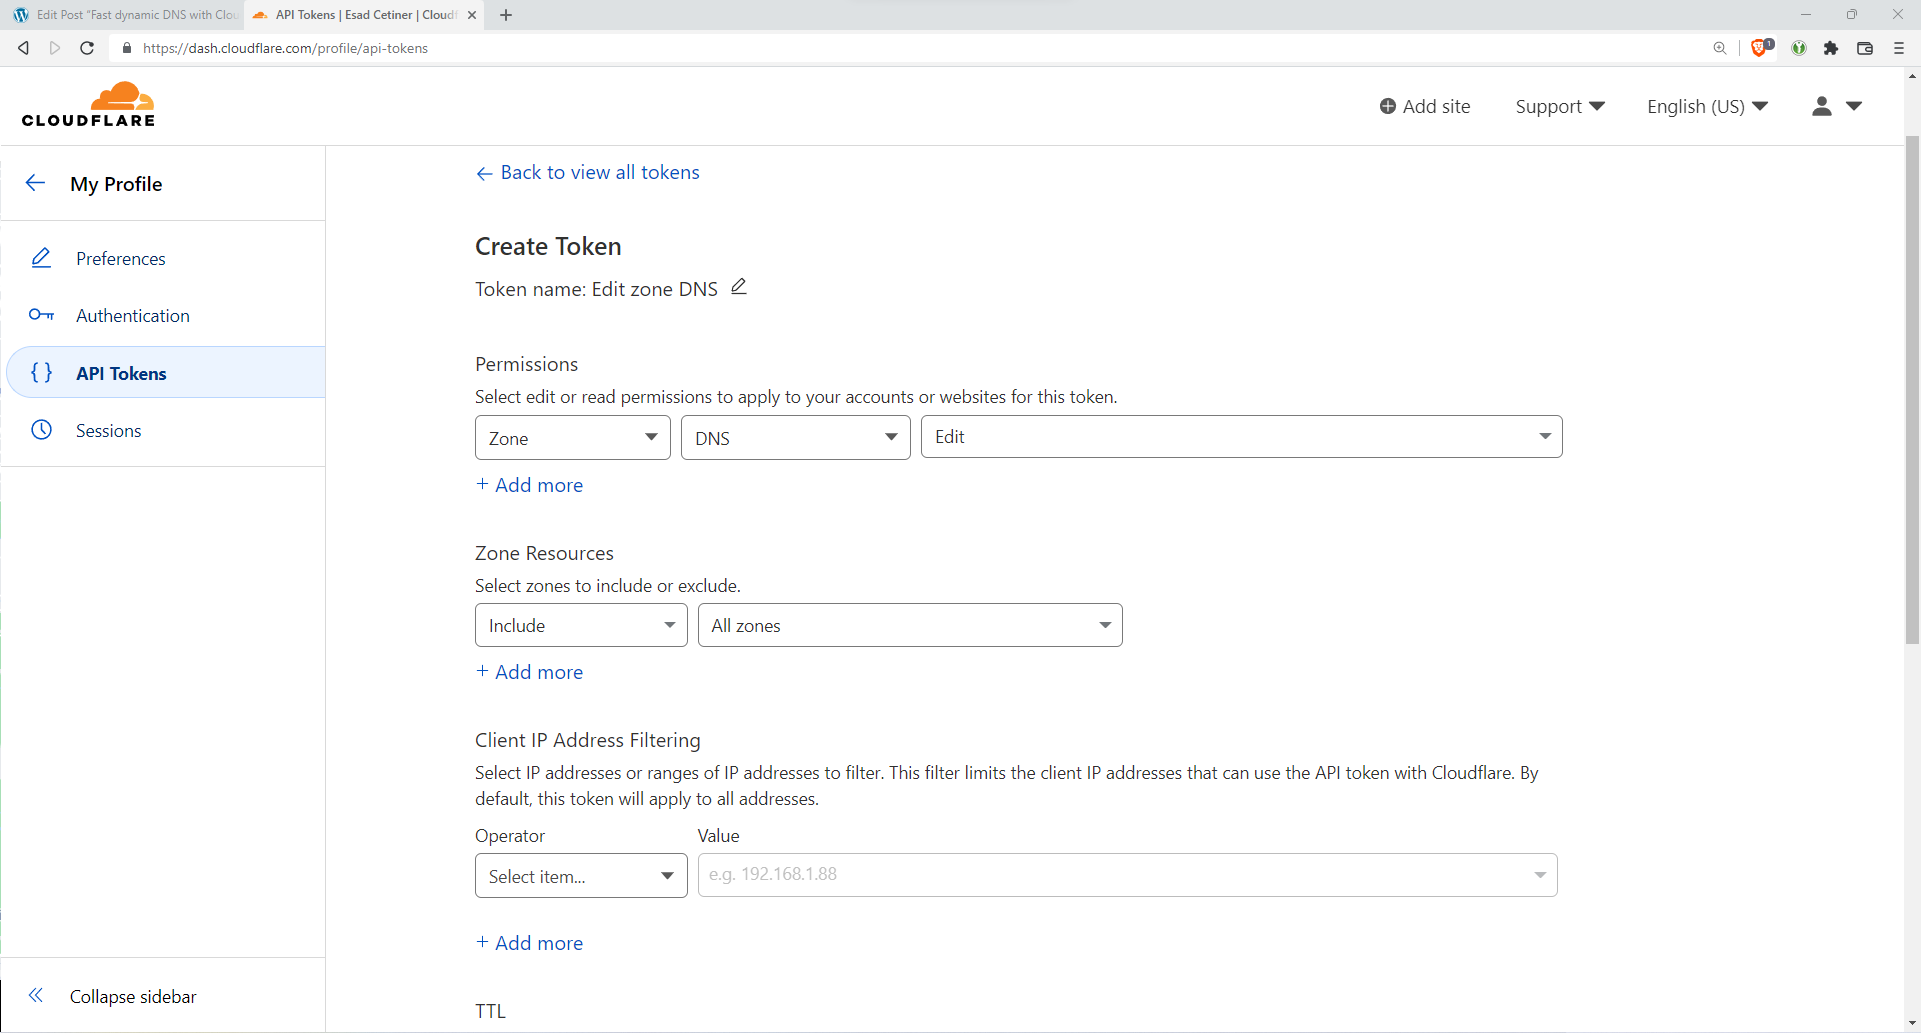
Next under API Token you want to click “Create Token” then under “Edit DNS Zone” click “Use Template”. Your token’s permissions should look like mine.
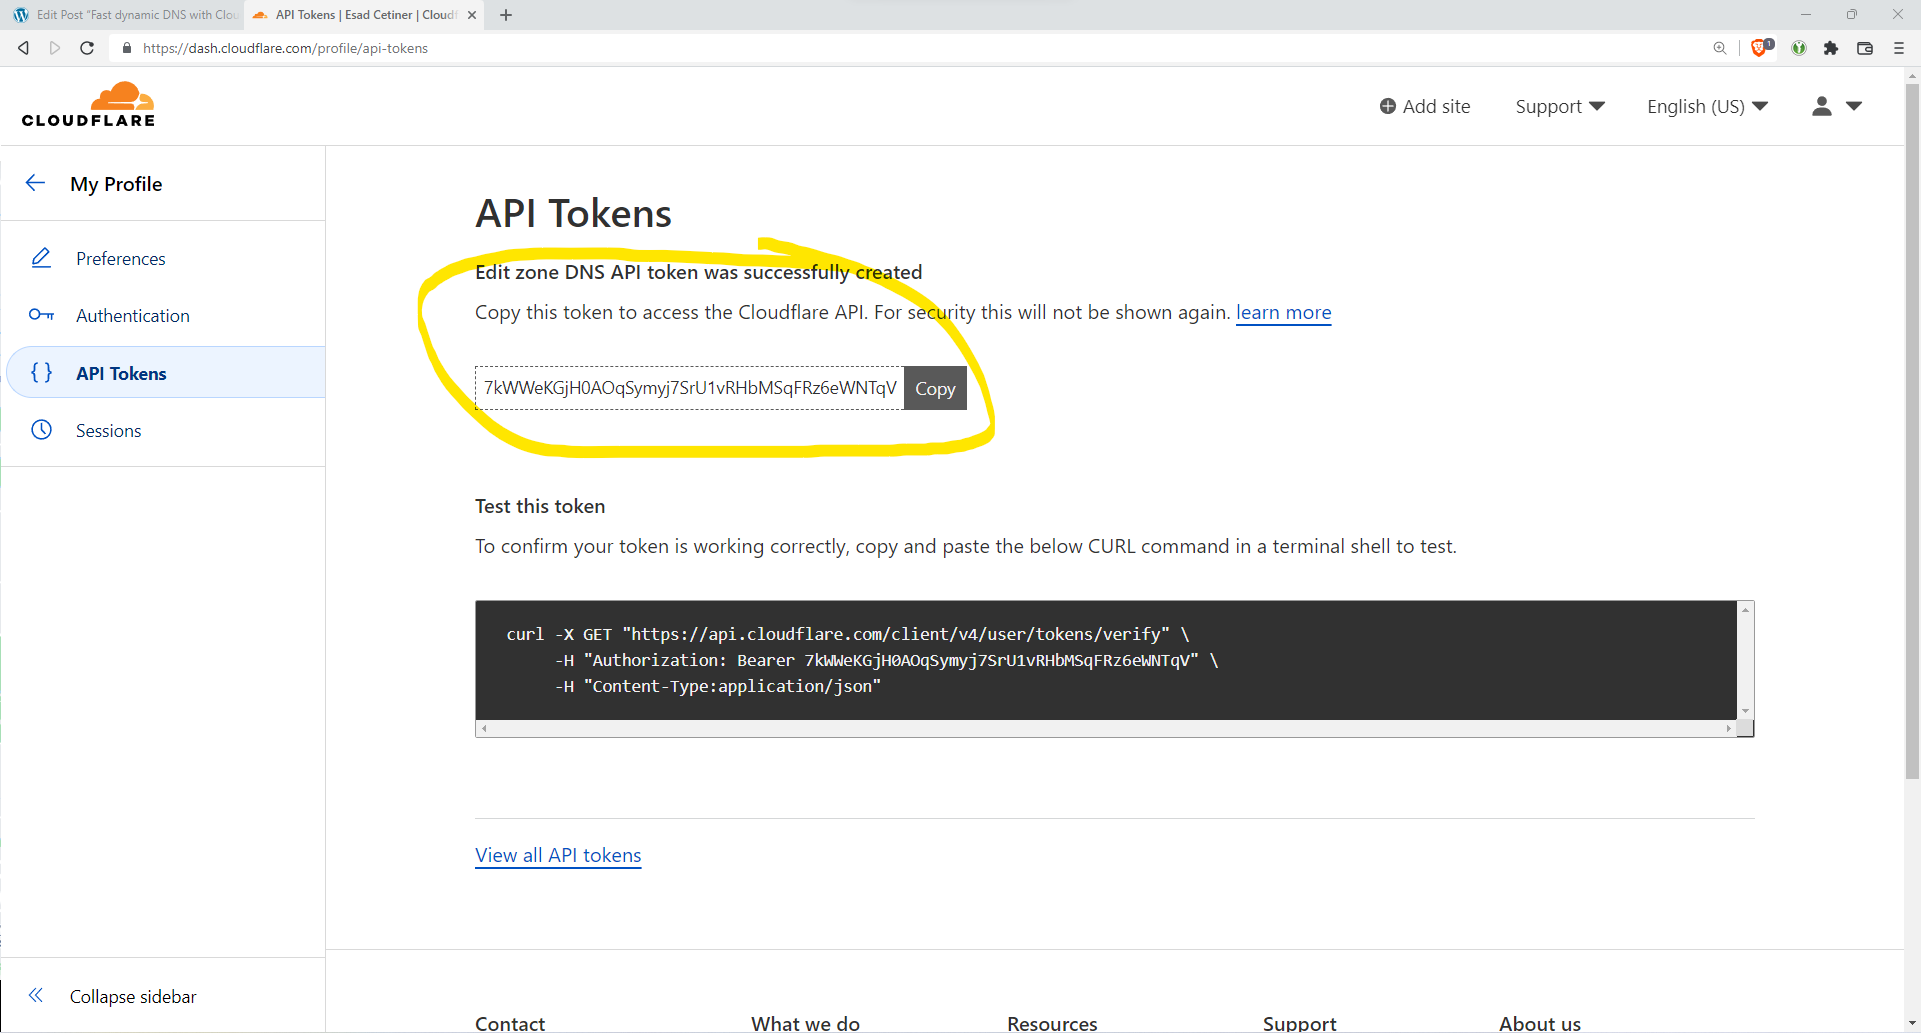
After that you’ll want to click “Continue to summary” then “Create Token”, Your Token will then be displayed. Make sure you keep your token safe and not publish it on the internet like I’m doing. (The token was revoked before this article was published.)
Configuring the script
Go back to your server and cd into cloudflare-ddns-updater.
cd cloudflare-ddns-updater/Open the file cloudflare-template.sh with a text editor, nano is a good beginner friendly text editor.
sudo nano cloudflare-template.shOnce you open the file you’ll be shown some lines that you’ll need to be configure, enter whatever value is relevant for your use case within the quotation marks then save and exit. The table below will guide you on how to fill it out.
| Setting | Description |
|---|---|
| auth_email | Put the email address that is used to log into Cloudflare. |
| auth_method | Set this value to token. |
| auth_key | You put the API token that we generated earlier here, Go back to “Getting our API token” if you do not have a API token. |
| zone_identifier | Put your Zone ID here, go back to “Getting our API token” if you don’t know what yours is. |
| record-name | Add your DNS record name here, subdomain.example.com or example.com go here. |
| ttl | How long (In seconds) a change in your DNS will take effect, set this to 60 so your DNS record can update quickly. |
| proxy | If you want to proxy your website through Cloudflare set this to true, Otherwise set it to false. |
Testing the script
To test the script, update the DNS record you want DDNS for and set it to an invalid IP address (For example 1.1.1.1). Make sure you wait a few minutes for the change to propagate. Check with dig to see if your DNS is invalid.
dig a example.com; <<>> DiG 9.18.1-1ubuntu1.2-Ubuntu <<>> a example.com
;; global options: +cmd
;; Got answer:
;; ->>HEADER<<- opcode: QUERY, status: NOERROR, id: 22899
;; flags: qr rd ra; QUERY: 1, ANSWER: 1, AUTHORITY: 0, ADDITIONAL: 1
;; OPT PSEUDOSECTION:
; EDNS: version: 0, flags:; udp: 65494
;; QUESTION SECTION:
;example.com. IN A
;; ANSWER SECTION:
example.com. 3600 IN A 93.184.216.34
;; Query time: 320 msec
;; SERVER: 127.0.0.53#53(127.0.0.53) (UDP)
;; WHEN: Fri Jan 13 04:26:46 AEDT 2023
;; MSG SIZE rcvd: 56
Once your DNS record has propigated, run the script, wait a few minutes then check again with dig. Your IP address should be your home IP address now.
sudo bash cloudflare-template.shCreate a cronjob to auto run the script
Now that we have a functioning script, we need to setup a cronjob so it runs automatically every minute. After all, nobody wants to have to run the script manually everytime something breaks!
crontab -eCopy paste the following and replace /path/to/script with the location to your script.
*/1 * * * * bash /path/to/script/cloudflare-template.shThat’s all there is to it, you’ve now setup DDNS with Cloudflare and your DNS records will be automatically updated as your IP address changes!
